Sculpey Clay⁚ A Beginner’s Guide
Embark on a creative journey with Sculpey clay! This versatile medium allows for jewelry, home décor, and sculptures. Discover the simple techniques, essential tools, and numerous project possibilities that await. From conditioning the clay to achieving a professional finish, this guide provides a step-by-step approach to successful Sculpey projects, suitable for all skill levels.
Understanding Polymer Clay
Polymer clay, a versatile crafting material, is a non-toxic, oven-bake clay made primarily from polyvinyl chloride (PVC), a common plastic polymer. This unique composition gives it exceptional malleability and vibrant color retention. Unlike air-dry clays, Sculpey polymer clay doesn’t dry out, remaining soft and workable until baked in a conventional oven. The baking process permanently sets the clay’s shape, resulting in durable, long-lasting creations. Its versatility extends to a vast array of projects, from intricate jewelry and detailed figurines to functional home décor items and mixed-media artwork. The ease of use and extensive color options make it perfect for both beginners and experienced crafters. The non-drying nature of polymer clay allows for ample time to work and refine your projects before baking, providing flexibility for even complex designs.
Types of Sculpey Clay and Their Properties
Sculpey offers a range of polymer clays, each with unique properties catering to different needs and project types. Sculpey III, known for its ease of use, is an excellent choice for beginners. Super Sculpey, slightly firmer, is ideal for detailed work and sculpting. Premo Sculpey, a more professional-grade clay, provides superior strength and durability, perfect for intricate designs and pieces that will experience more wear and tear. The original Sculpey clay offers a softer, more pliable feel, well-suited for basic projects and those who prefer a more forgiving material. Each clay type has a slightly different texture and feel, influencing its workability. Understanding these differences will enable you to select the most appropriate clay for your chosen project, ensuring optimal results and a satisfying crafting experience. Consider the desired level of detail, strength, and overall project requirements when making your selection.
Essential Tools for Working with Sculpey
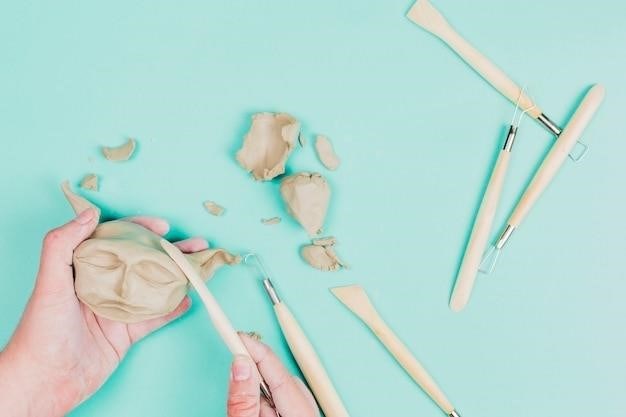
To embark on your Sculpey crafting journey, gather a few essential tools. A smooth work surface, such as glass or tile, is crucial for easy cleanup and prevents the clay from sticking. A clay conditioning machine, while optional, significantly simplifies the process, making the clay more pliable and easier to work with. Various sculpting tools are valuable for shaping and adding details; these can range from simple tools like toothpicks and needles to specialized sculpting tools available at craft stores. A sharp blade or craft knife is necessary for precise cutting and shaping. Remember to include a non-stick baking sheet or parchment paper to prevent sticking during the baking process. For finishing touches, sandpaper of varying grits and a polishing cloth are beneficial for smoothing and achieving a professional shine. Finally, an oven thermometer ensures accurate baking temperatures crucial for proper curing of the clay. With these essential tools at your disposal, you are well-prepared to create beautiful Sculpey projects.

Preparing and Conditioning the Clay
Before sculpting, properly condition your Sculpey clay. Warm it gently, then knead and stretch until it becomes soft and pliable. This ensures optimal workability and prevents cracking during baking. A pasta machine can assist in achieving uniform consistency.
Conditioning Techniques for Optimal Workability
Proper conditioning is crucial for successful Sculpey projects. Begin by warming the clay using your hands; the warmth makes it more pliable. Knead the clay thoroughly, working out any air bubbles and achieving a smooth, uniform texture. This process improves the clay’s flexibility and prevents cracking during baking. For larger projects or to achieve a perfectly even consistency, consider using a clay conditioning machine. These machines efficiently work the clay, ensuring a smooth and uniform texture throughout. Remember, patience is key; take your time to ensure the clay is thoroughly conditioned before you begin sculpting. The result will be a more enjoyable and successful sculpting experience, leading to a higher-quality finished product. Improperly conditioned clay can lead to cracking or uneven textures in your finished piece, so this step is vital to the success of your project. Thoroughly conditioned clay will be easier to sculpt and will yield better results.
Achieving the Right Consistency for Your Project
The ideal consistency of your Sculpey clay depends heavily on your chosen project. For intricate details and fine sculpting, a firmer consistency is preferred. This allows for precise shaping and prevents the clay from sagging or losing its form. Achieve this by thoroughly kneading the clay until it’s less pliable, but still workable. Conversely, larger projects or those requiring smooth, even surfaces benefit from a softer consistency. To achieve this, work the clay more extensively, adding a bit of extra warmth and kneading until it feels soft and supple. This enhanced pliability makes it easier to blend colors and create seamless transitions. Experiment to find the perfect balance for your specific needs. Remember, you can always adjust the clay’s consistency by further kneading or allowing it to rest for a short while to firm up slightly. The key is to find a consistency that allows you to work efficiently and comfortably, achieving your desired results.

Sculpting and Shaping Your Creation
Transform your conditioned clay into stunning works of art! Explore basic sculpting techniques, add intricate details, and experiment with textures to bring your vision to life. Let your creativity flow!
Basic Sculpting Techniques for Beginners
Begin your Sculpey journey with fundamental techniques. Start with simple shapes like spheres, cylinders, and cubes, building confidence as you master the feel of the clay. Pinch, roll, and coil methods are excellent starting points. Pinch small amounts of clay together to create organic forms, or roll clay into even ropes for coils. Experiment with blending colors directly on the clay’s surface, creating beautiful marbled effects. Don’t be afraid to try different approaches; Sculpey’s malleability allows for easy corrections and adjustments. Remember, practice is key! The more you work with the clay, the more comfortable you’ll become with its properties and your ability to manipulate it. Simple tools like sculpting tools or even toothpicks can add texture and detail to your creations. These basic skills form a solid foundation for more complex projects.
Adding Details and Texture to Your Sculptures
Elevate your Sculpey creations by adding intricate details and textures. Utilize various tools to achieve diverse effects. A simple toothpick can create fine lines and delicate markings, while a ball-shaped stylus adds subtle indents. For more pronounced textures, consider using stamps, textured rollers, or even everyday objects like fabric or lace to impress patterns onto the clay’s surface. Experiment with different techniques to achieve the desired outcome. Remember that less is often more; subtle details can significantly impact the overall aesthetic appeal of your sculpture. Don’t hesitate to combine various techniques. For instance, you might use a sculpting tool to create a base shape, then employ a textured roller to add a patterned surface, followed by the careful addition of smaller details with a toothpick. The possibilities are truly endless, limited only by your imagination and creativity.
Baking Your Sculpey Project
Proper baking is crucial for durability. Follow the manufacturer’s instructions precisely regarding temperature and time. Use an oven thermometer for accuracy and prevent underbaking or burning. Avoid microwaving.
Proper Baking Techniques for Different Clay Types
Sculpey clay comes in various types, each with specific baking requirements. Always check the packaging for precise instructions. Generally, preheat your oven to the recommended temperature, typically around 275°F (135°C). Thicker pieces require longer baking times than thinner ones to ensure complete curing. Use an oven thermometer to monitor the temperature accurately, as inconsistencies can lead to uneven baking and potentially brittle or weak finished pieces. Baking on a parchment-lined baking sheet is recommended to prevent sticking. For larger projects, consider using a baking rack to ensure even heat circulation. Overbaking can cause discoloration or warping, while underbaking results in a weaker, more fragile product prone to cracking or breaking. Follow instructions carefully for optimal results.
Troubleshooting Common Baking Issues
Encountering problems with your Sculpey creations? Uneven baking often stems from inconsistent oven temperatures; an oven thermometer is invaluable. If your clay is brittle or cracks easily, it’s likely underbaked. Increase baking time according to the manufacturer’s instructions, ensuring even heat distribution. Discoloration might indicate overbaking; reduce baking time in future projects. Sticky or gummy clay usually points to insufficient baking; retry with a longer baking time at the correct temperature. If your piece warps or bubbles, it may be due to too-rapid heating or uneven thickness; bake thinner pieces for shorter periods. Remember to always preheat your oven thoroughly before baking. Consult the specific instructions for your type of Sculpey clay for the best results. Careful attention to detail will improve your success rate.
Finishing and Refinements
Enhance your Sculpey creations with sanding, buffing, and polishing for a smooth, professional finish. Explore adding color and glaze to personalize your artwork and achieve a unique, eye-catching look.
Sanding, Buffing, and Polishing Your Piece
Once your Sculpey project is baked and cooled, refining its surface is key to achieving a professional look. Begin by gently sanding any imperfections using progressively finer grit sandpaper (e.g., 220, 400, and then 600 grit). This process smooths rough edges and removes any unwanted texture. Always sand in one direction to avoid creating swirl marks. After sanding, switch to a buffing wheel attached to a Dremel or similar tool. Use a soft cloth or buffing pad with a polishing compound to achieve a high shine. For a truly polished finish, consider using progressively finer polishing compounds, each step enhancing the gloss. This meticulous process transforms your piece from a simple creation into a refined, almost jewel-like sculpture. Remember to clean your tools thoroughly between grits and compounds to prevent cross-contamination and maintain a smooth, even surface throughout the polishing phase. For intricate details, fine-grit sandpaper and a gentle touch are essential. A final wipe with a soft, clean cloth reveals the final, polished masterpiece. The result is a durable, polished piece ready for display or gifting.
Adding Color and Glaze for a Professional Finish
Enhance your Sculpey creations with vibrant colors and protective glazes. Sculpey offers a range of colors, allowing you to mix and match to achieve the perfect shade. For a smooth, even application, blend colors thoroughly before shaping your piece; Consider using acrylic paints for detailed designs or to add highlights after baking. Once your piece is baked and polished, a glaze adds a protective layer and enhances the color. Sculpey offers specialized polymer clay glazes that are specifically designed to work with their clay. Apply a thin, even coat using a brush or airbrush, ensuring complete coverage. Allow the glaze to dry completely according to the manufacturer’s instructions before handling. Several thin coats are better than one thick coat to prevent drips and ensure an even finish. For a matte finish, use a matte sealant instead of a gloss glaze. Remember that the glaze enhances the colors and adds durability, protecting your piece from scratches and wear. Experiment with different colors and glazes to achieve your desired aesthetic, transforming your Sculpey project into a true work of art.


